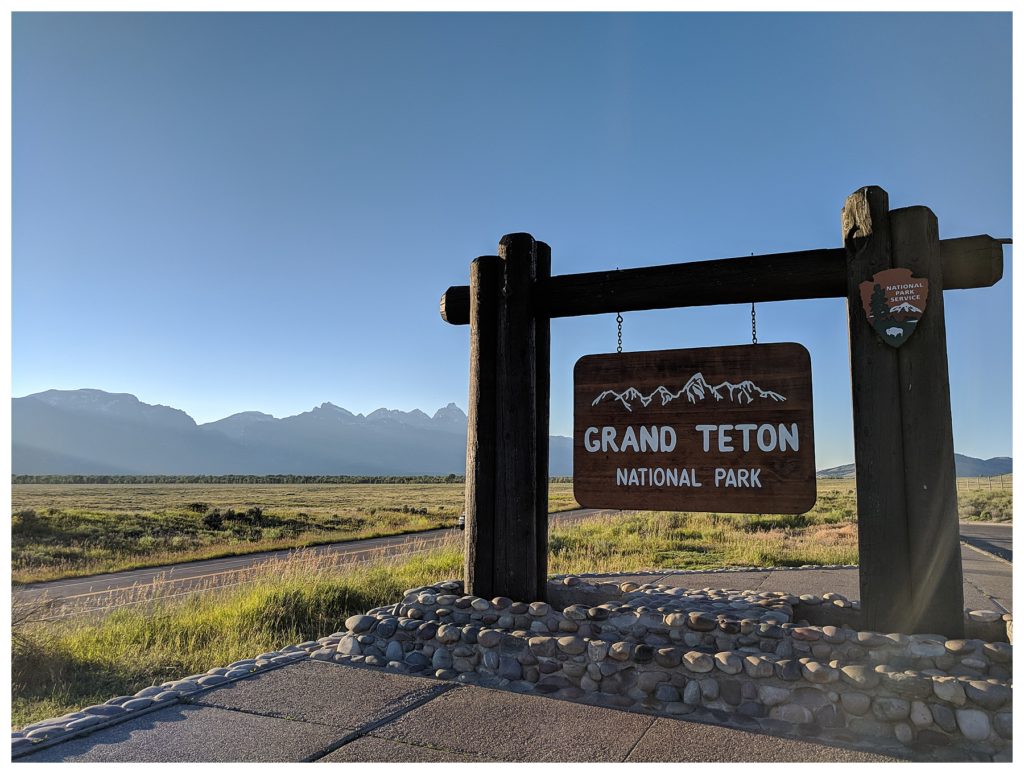
Two years ago, I embarked on a journey of a lifetime to summit Grand Teton Mountain. The goal was simple: reach the summit of Grand Teton in support of Vs. Cancer, a foundation that supports children battling cancer. The journey to the top, however, was anything but simple. It has taken me two years to fully digest the adventure I was on and what I was able to accomplish. As I prepare for my next adventure, I decided it was finally time to write down and share my thoughts on my experience. What better time than the two year anniversary of accomplishing that goal.
These photos were all taken with either a GoPro or cell phones. To save on weight, the good camera equipment had to stay behind. I still think we got some pretty incredible photos!
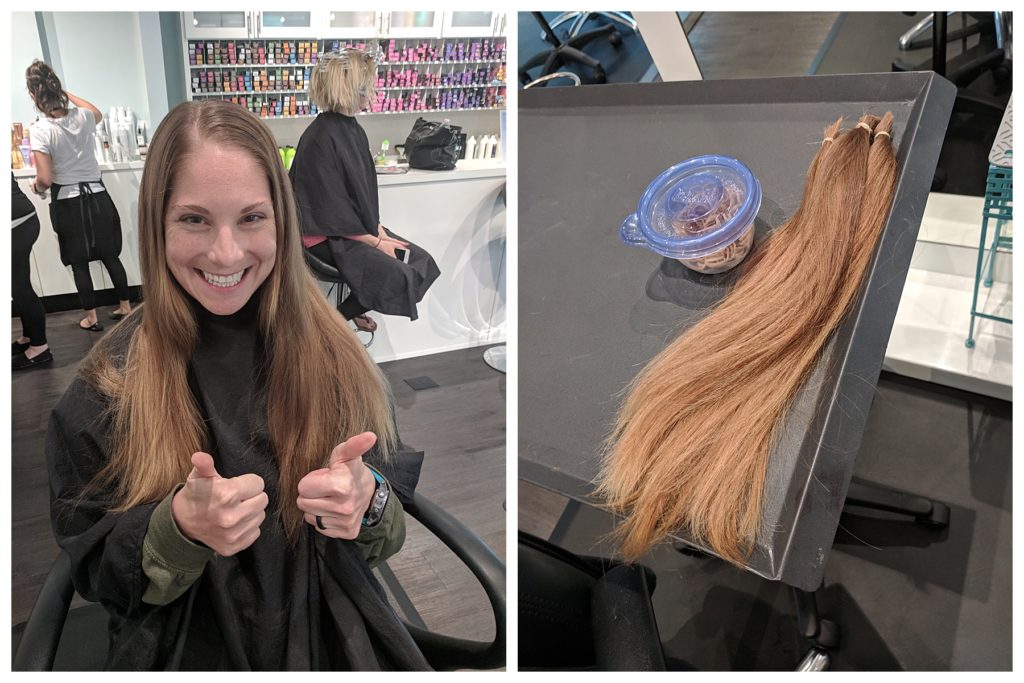
Now, you may be saying to yourself “People climb Teton all the time. Why was this a such a big deal?” That’s true. There are people who will day hike and free climb to the top of Grand Teton. Those folks are experienced hikers and climbers who know the Tetons well enough to do that. I am not one of those people however. With a very healthy fear of open heights, I never had ambitions of summiting a mountain. After being introduced to indoor climbing, I began to push what I perceived my limits to be. I began climbing higher and outdoors. At that point, was climbing a mountain that unrealistic? To motivate myself to stay focused, I partnered with Vs. Cancer to fundraise for the Children’s Cancer Hospital at Duke. To encourage others to help us reach our fundraising goal, I promised to donate my hair and Nathan agreed to go bald. A few days before we left, I made good on that promise and donated 14 inches of hair.
A group of us got together and decided Grand Teton was going to be what we tackled together. Our friend Mike was an experienced climber/mountaineer and felt comfortable leading us up. After much research, we chose to do the Owen Spalding route. There are a couple different routes to reach the summit of Grand Teton. Some offer harder climbing and/or more exposure. Regardless of what route you take, technical climbing is involved. If you do not have an experienced leader in your group, taking a guide service is really the only other way to go. The journey up Teton is dangerous. In fact, two people fell to their deaths just weeks before our trip. Experience and preparation is key. It was really the only way I was able to move beyond my paralyzing fear to make it to the summit.
 Once we picked the route and decided on a time table for the trek, we applied for back country permits through the National Park Services. Our goal was to get at least two night at the Lower Saddle camp ground, the last camp ground before the summit. The plan was to hike up to the Lower Saddle on day 1, summit on day 2 and hike out day 3. If we could secure a 3rd night, that day would be used as a back up day in case the weather was questions able on the planned summit day. The process for getting a permit for Grand Teton (really any park) is stressful. Most permits book out as soon as they are made available. Some have a rolling process throughout the year. Teton’s permitting system opens the beginning of January for the entire year. Given the short window available for summiting, the permits go quickly. The first day it opened, we put in our request and were able to secure two nights at the Lower Saddle for the middle of July. Our dates were now set.
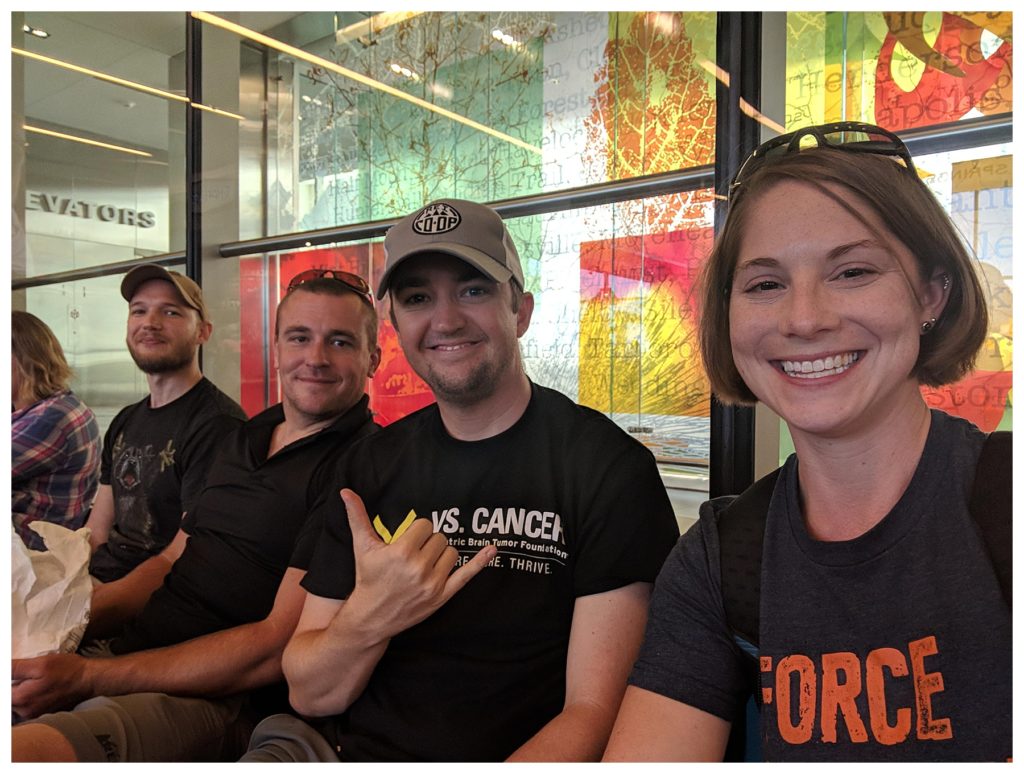
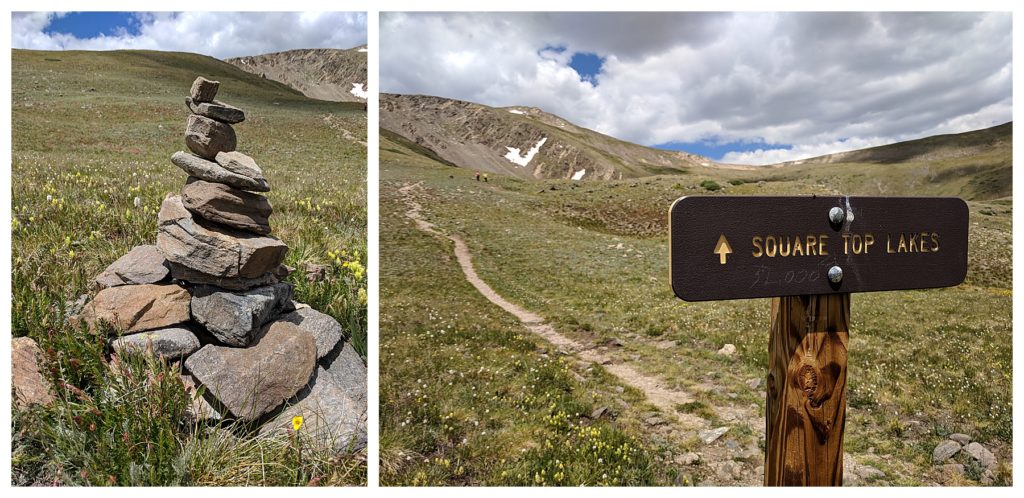
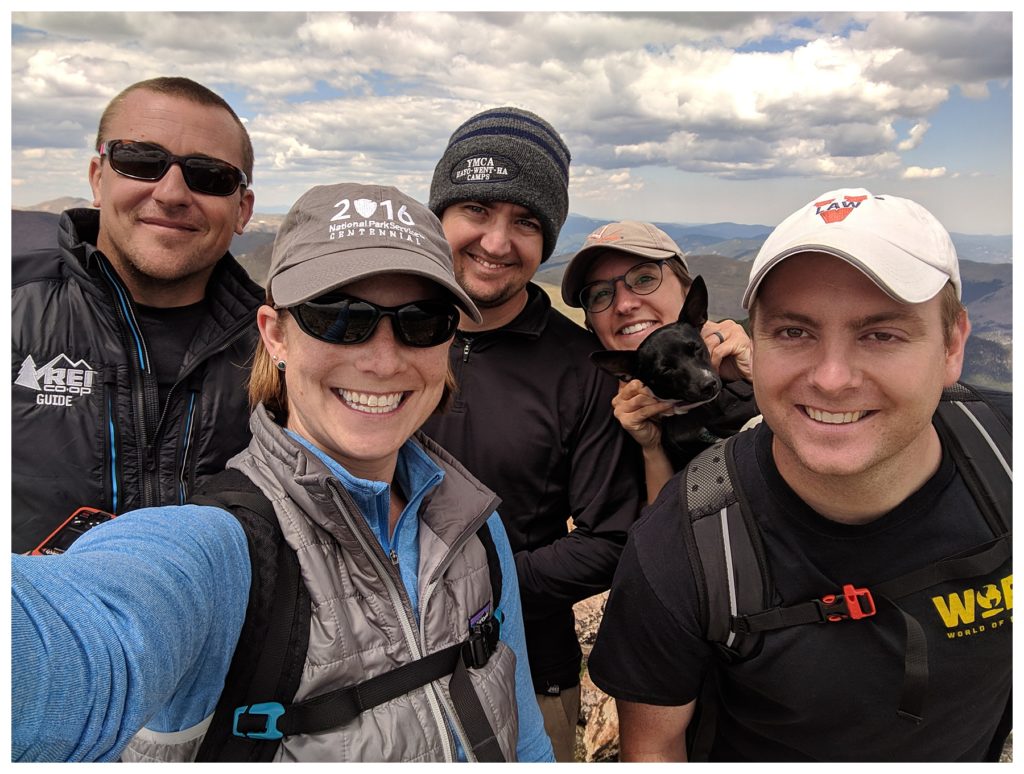
Our trip was nine days total. We flew into Denver and spent a few days hiking to get acclimated to the altitude. Half of our group had never been to 14,000 feet before, and we wanted to make sure any issues with acclimation were discovered before our summit attempt so that any adjustments could be made beforehand. Luckily, the Denver area as an incredible number of awesome 14,000-foot peaks. With our summit packs in tow, we hiked to the top of Square Top. Even with our pre-trip preparation, it became clear that Teton was going to be quite the task and that some adjustments were going to need to be made before leaving Denver.
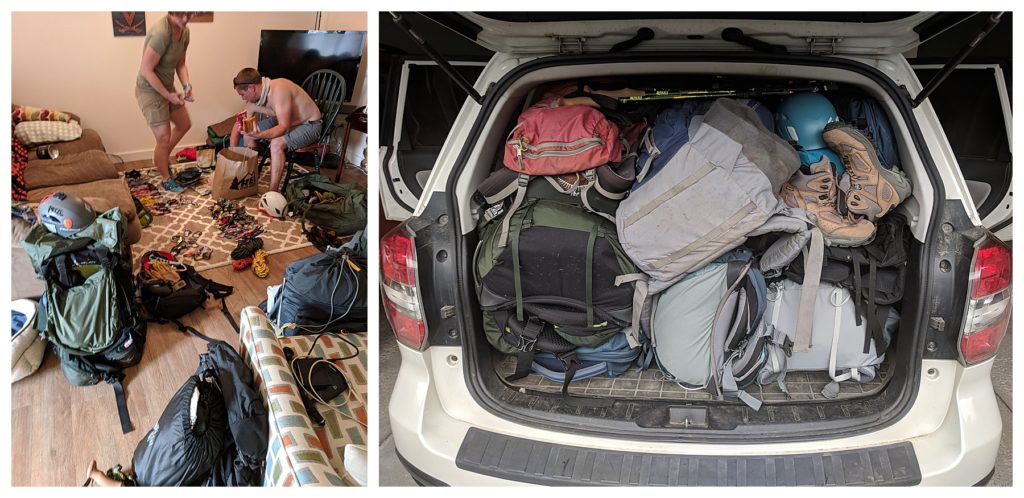
Our last night in Denver was spent re-evaluating what was absolutely needed and what wasn’t. The altitude had proven just enough of an issue that lightening the packs became a necessity. Would we be able to manage our gear if it was suddenly divided between three instead of four? By Sunday morning, the cars were packed and we were ready to hit the road for our eight hour drive.
By the time we arrived at the park, all of the camp grounds were full. All of Grand Teton National Park’s camp grounds are first come, first served. We knew that by the time we would arrive, a camp site would be almost impossible to get. Our plan was to find a camp site in neighboring Bridger-Teton National Forest. Camp sites in national forests are also first come, first served. They are also free! Now, before you get too excited, there is a reason why. Camp sites in national forests are almost always primitive. There is no restroom, camp store or trash disposal. It is simply a clearing with usually a fire pit of some kind. These are truly backcountry sites.
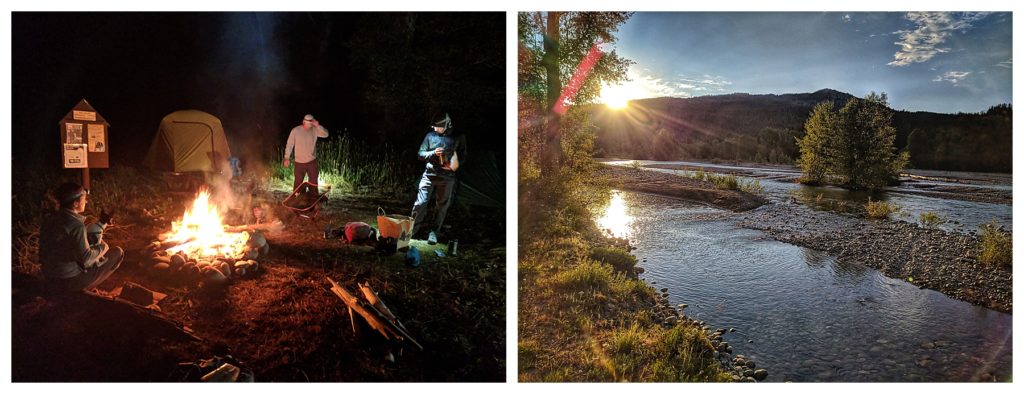
After a quick conversation with a park ranger, we headed a mile down a dirt road that connected the two parks. Eventually, we found a camp site and quickly set up beginning with a fire. It was dark and the mosquitos were terrible! Once we got set up, it was dinner, then bed. The plan was to pack up early to get in line for a camp site in Grand Teton NP. It wasn’t until the sun came up in the morning that we actually saw how beautiful our site was.
After an hour wait, we were able to secure a camp site in the Colter Bay campground. We quickly set up camp and set out for the back country office to get our permits. The back country office is by the visitor center at Jenny Lake. The ranger went over everything that was happening on the mountain in great detail. Since we were going on our own and not with a guide, they wanted us to be 100 percent prepared. They also offered us poo bags. Grand Teton requires that all trash be carried out. Given the temperatures and altitude, that also included poo which tends not to break down in that environment. Behind the ranger was a huge display of climbing gear, all of which had been damaged in lightning strikes. It was a reminder of just how dangerous the trip to the summit can be. Being prepared and aware of the weather is key to summiting safely.
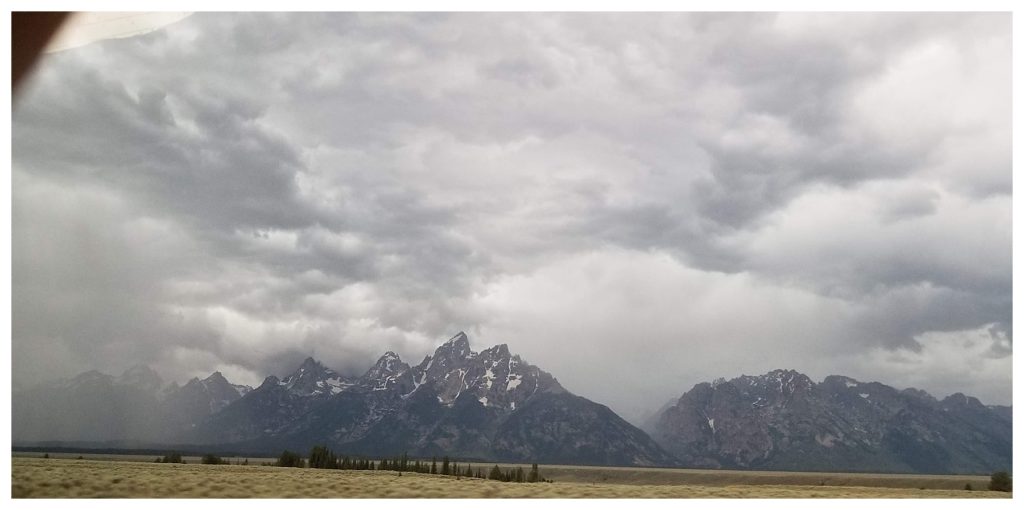
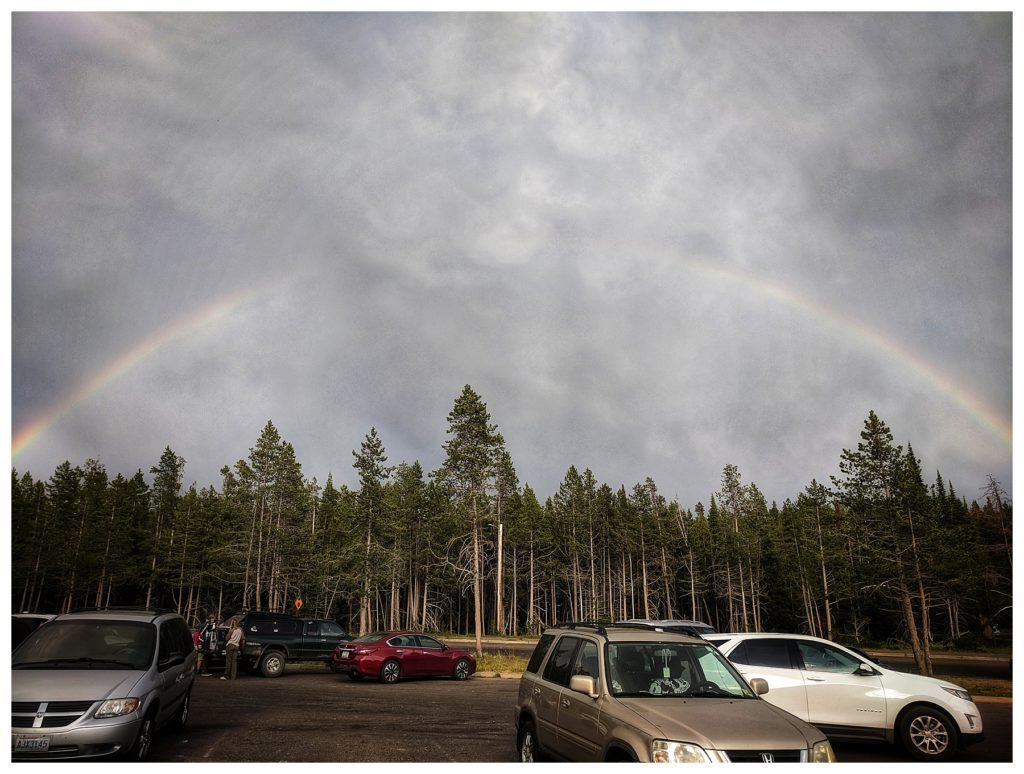
After a few easy hikes, we made our way back to camp. As we arrived, a huge storm moved in from the West. Within minutes, the storm clouds funneled through the Lower Saddle, the between the Grand and Middle Teton and base camp for those attempting to summit. There was lightning and a crushing rain. Then, just as quickly as it moved in, the storm was gone. We were left wondering if we were up for something similar. The thought was terrifying! I think Mother Nature was trying to reassure me when this rainbow appeared over our campsite.
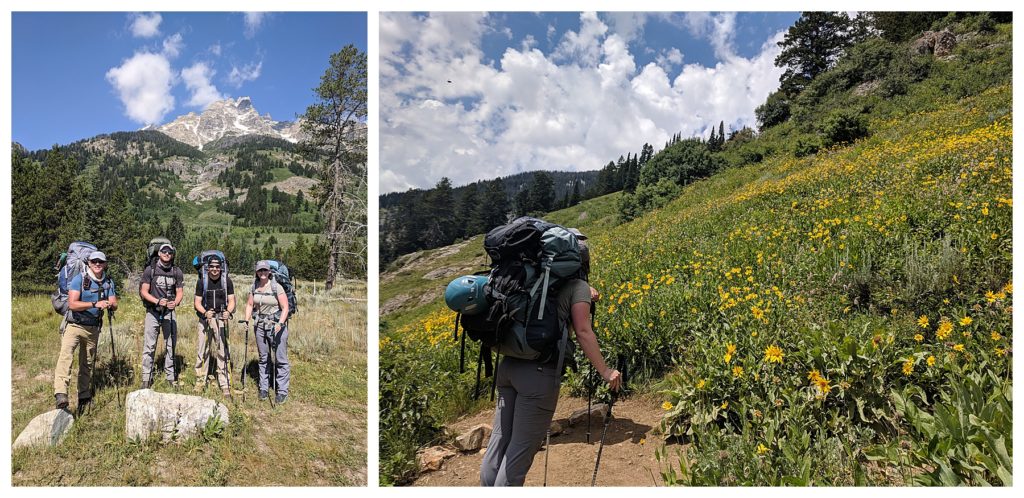
We had scheduled our summit attempt to take three days total. The goal for the first day was to get to the Lower Saddle base camp. The six-plus mile journey would take us through Garnet Canyon and gain over 5,300 feet in elevation. We began at Lupine Meadows. We were dropped off, but there is a parking lot that those hiking up to the top can park in. Rangers simply ask that you put a note on your car with your hiking dates so that they know you are ok. There is an outhouse there. This is your last place to go before heading into the woods.
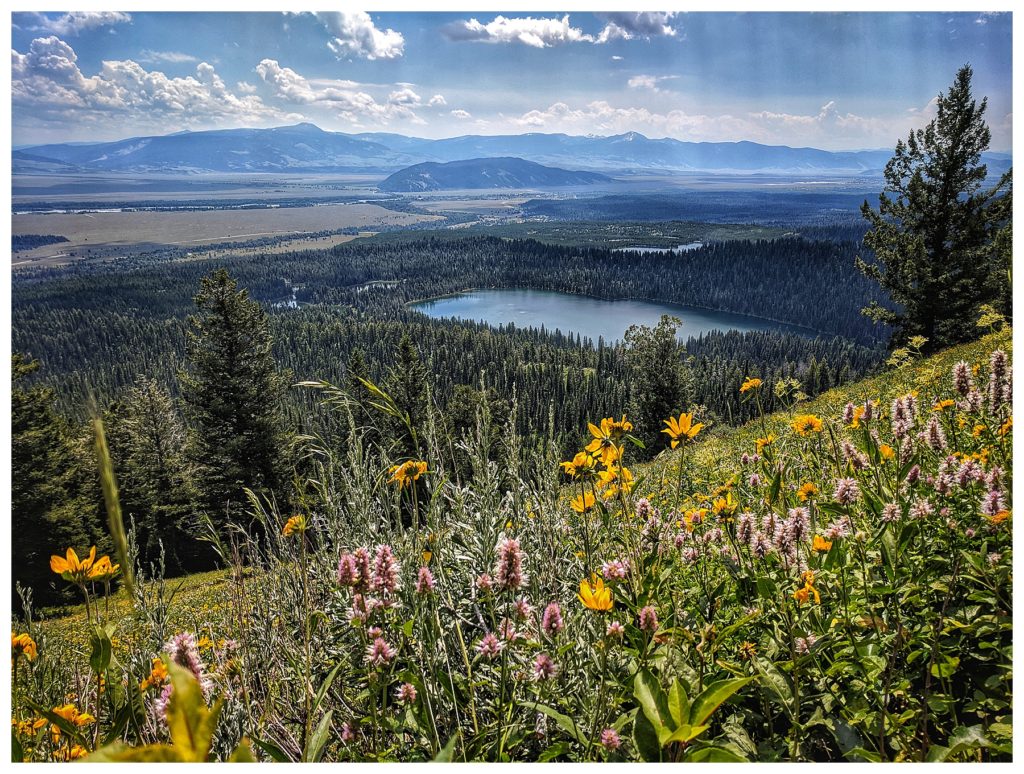
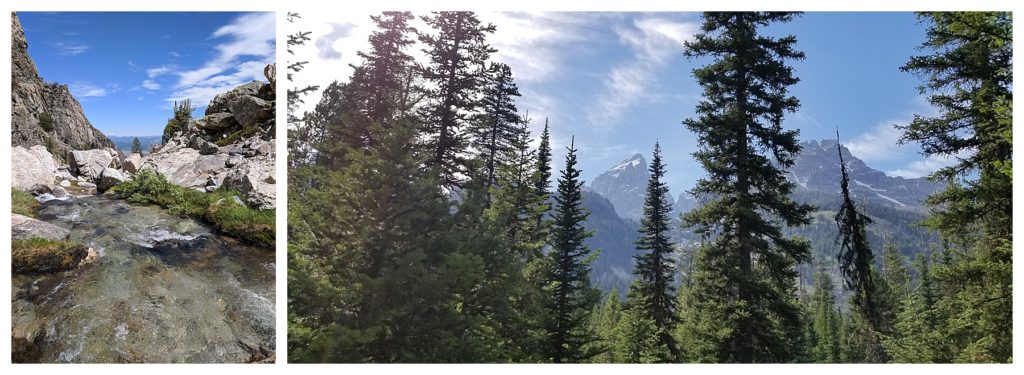
Lupine Meadows is the picture perfect summer mountain side. Dirt switchback trails cut through rolling hills of wild flowers. We saw black bear cubs playing in a clump of trees while their mother watched from a warm, sunny spot. Two park rangers we passed gave us the heads up that a grizzly bear was running and rolling around through the flowers. By the time we reached that clearing, he had moved on. However, I imagine he was having the time of his life. There are several picture worthy overlooks as well as shaded places to take snack breaks.
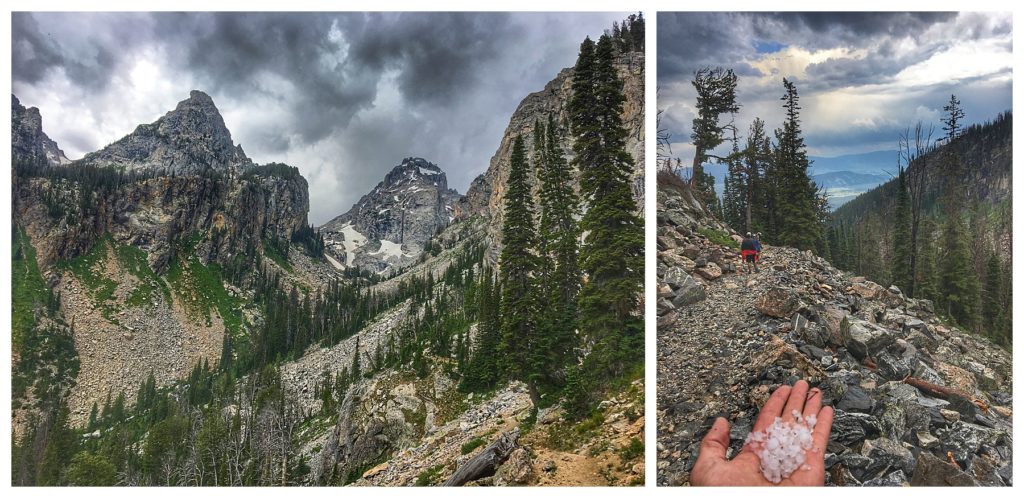
As we entered Garnet Canyon, a storm rolled in and began dumping hail on us. With a stream crossing in front of us and only a handful of trees at this elevation, we were left with only the option to shelter in place. We put on our helmets and rain gear then spread out 50-75 yards apart along the trail. The idea being that if lightning were to strike, we were far enough apart that it wouldn’t hit all of us. Someone would be able to go get help. The storm lasted 15 intense minutes. It seemed like forever. Once it passed, we grouped back up and began our hike into the canyon.

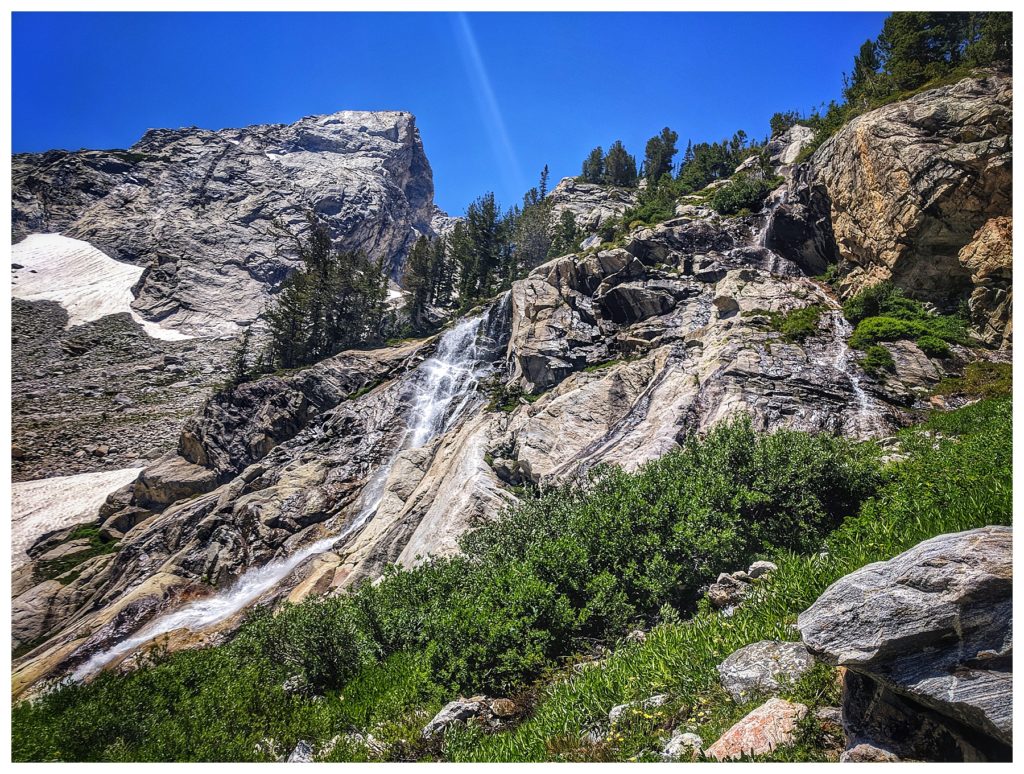
Garnet Canyon is amazing! Glaciers, boulders and waterfalls are just some of the features that make Garnet Canyon so beautiful. The trek through Garnet Canyon is not an easy one however. Most hiking and outdoor sites rate it as hard. Also, once you enter the canyon, there are no marked trails. Being prepared and having a good sense of where you are going is a must. If you are up for a challenging day hike, doing the 12.5 round trip hike from the parking lot to the lower saddle is spectacular. Be prepared with the essentials. This is considered backcountry hiking and they will certainly be needed.
Part of the hike cuts through a large boulder field. There are many big steps up and down. If you are backpacking, be prepared to take your pack on and off and leverage your weight to help you make some of those bigger steps. It was probably one of the more challenging part to the hike in. We may have broken a few trekking poles as well. Once out of the boulder field, you are left with breathtaking views of waterfalls, glaciers and the valley below.
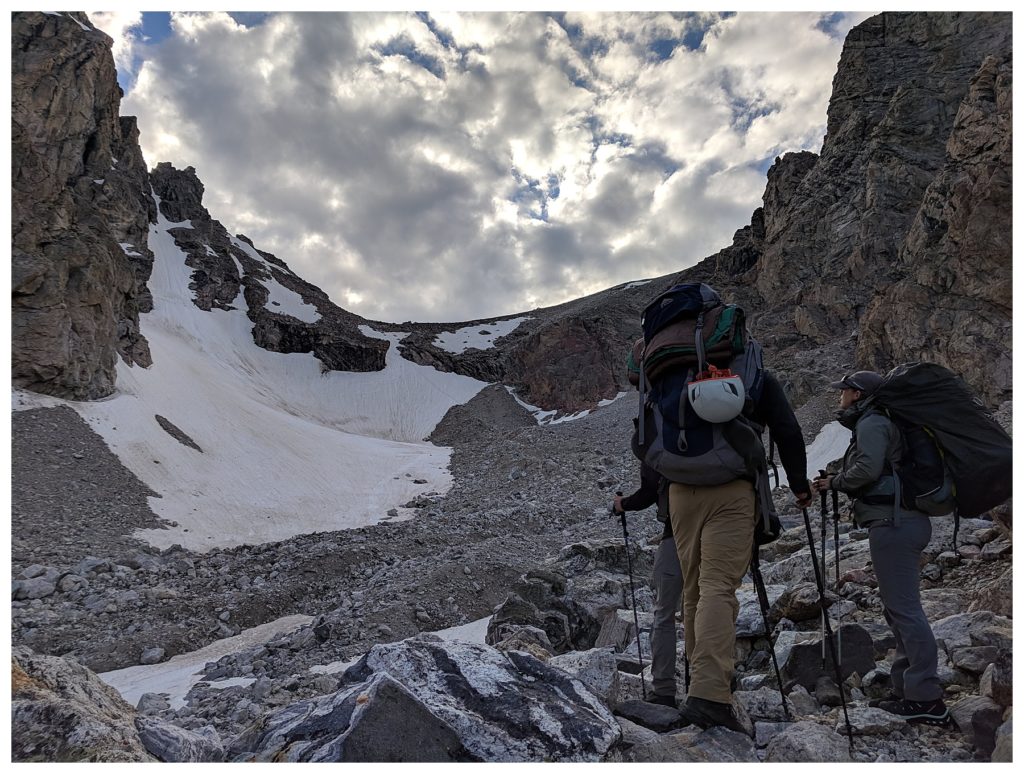
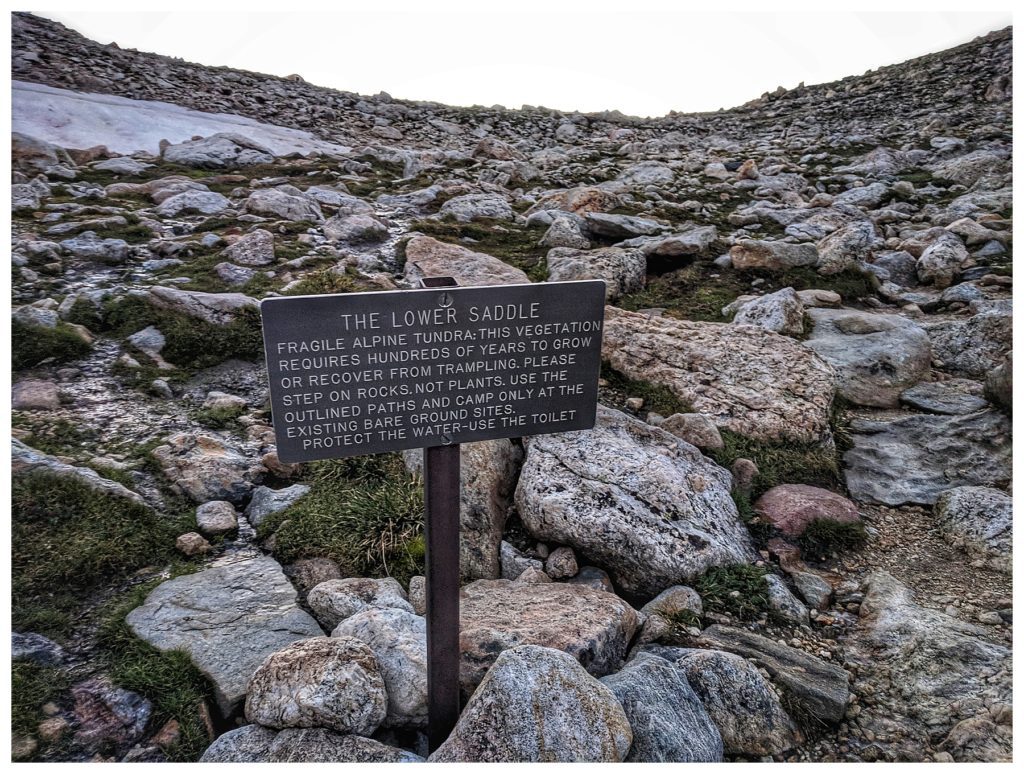
As the sun began to set, we made our final push to the Lower Saddle. We were tired, hungry and knew we needed to set up quickly before it got dark. All of that led to a somewhat frustrating final hour of hiking. The approach to the Lower Saddle seems easy enough. However, there is one section where you must use ropes to pull yourself up the wall. A permanent rope has been anchored to rock for those coming up without any (mostly the guided groups). While we had rope, I was grateful we didn’t have to unpack it and take more time. By the end of the day, this section had become iced over. The rope was wet and very cold. Once we were up and had lifted up our packs, we were greeted by the sign for the Lower Saddle. The race was now on to set up camp before dark.
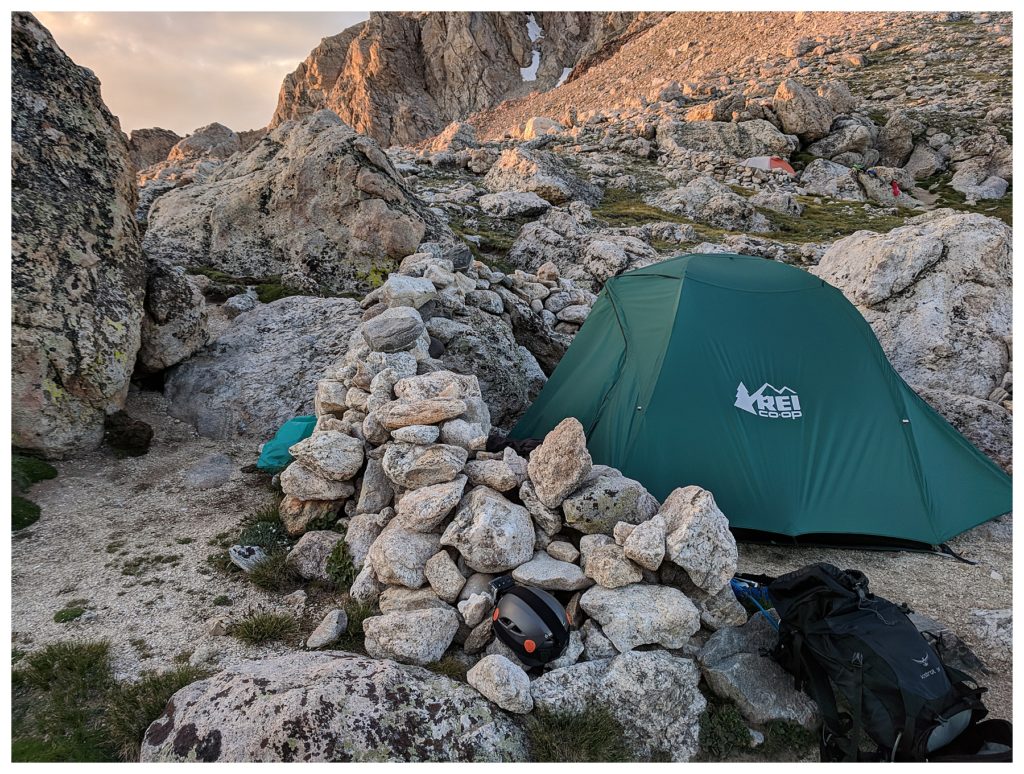
Camp sites are first come first serve. When you secure a back country permit, you are guaranteed a spot. However, not every spot is made equal. Since the Lower Saddle sits between the Middle and Grand Teton, the wind is funneled through the camp ground. Some are better protected from the wind. Others are near the bear boxes (yes, there are bear boxes up there that you have to put your stuff in). Some are closer to the “bathroom”. The bathroom are two somewhat closed in boxes on the edge of the campground that offer some privacy when needing to go. There is a wooden seat and your poo bag sits under it. It is probably the most incredible view you will have have while using the bathroom, but it is cold and windy! Since it is shared by the whole camp ground, setting up near it isn’t the most ideal. All this to say that the earlier you get up there, the better location you will get.
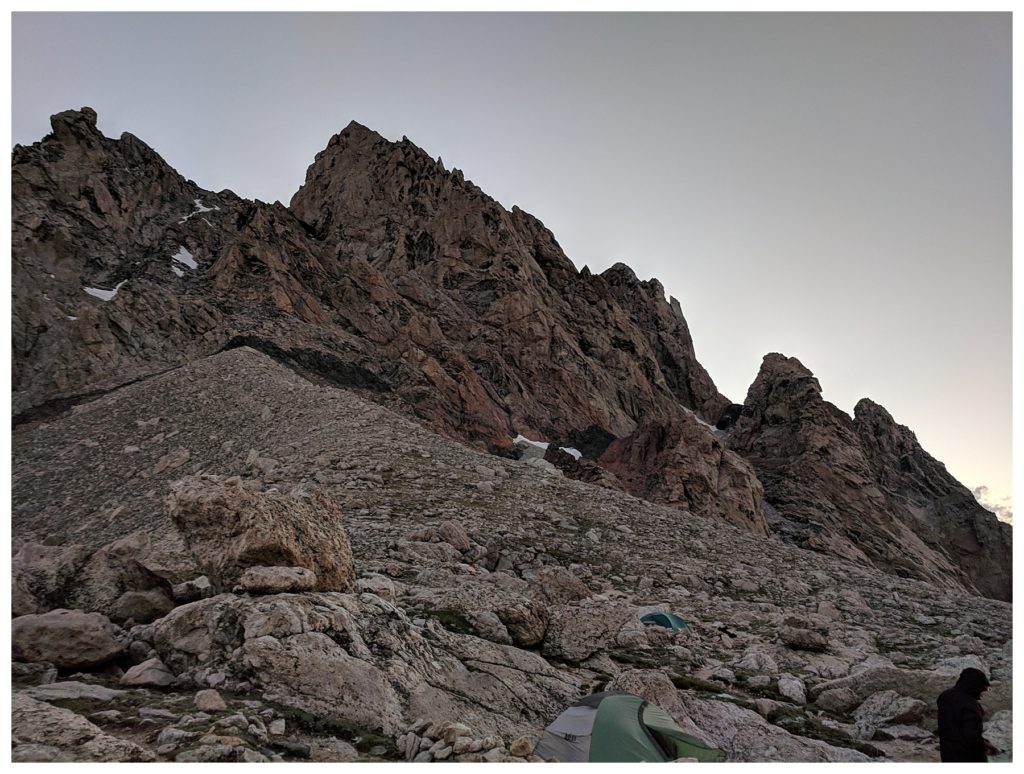
My view when I woke up on summit day. It is amazing how close the top looks even though it is so far away. I would be lying if I said I wasn’t nervous looking up at her. In fact, I was sick to my stomach from the nerves.
The morning of our summit attempt, we got up at 4 a.m. and began filling water bottles and preparing our summit bags. Most of the guided groups were taking off between 4-5 a.m. So we had the water spring to ourselves to refill all of our bottles. For this type of trek, I highly recommend using Nalgene bottles. They are light weight, almost indestructible and won’t freeze. We finally got going about 7:30 a.m. It was a much later start than we had wanted, but luckily the weather was perfect and accommodating.
There are a couple routes that you can take to get to the summit. Each route offers its own challenges: exposure, climbing difficulty, etc. We chose to do the Owen Spalding route due to a combination of exposure and ease of the climbing. It is one of the more popular routes for this reason. Once again, there are no markers letting you know which way each route goes. It is up to you or your guide to know. We had done a great deal of research ahead of time and brought printouts from books explaining the route. Even then, we still managed to make a wrong turn and ended up climbing a series of chimneys that were much harder than we had planned for. Again, you cannot prepare enough! Luckily, we were able to use the printouts we had to get back on track quickly.
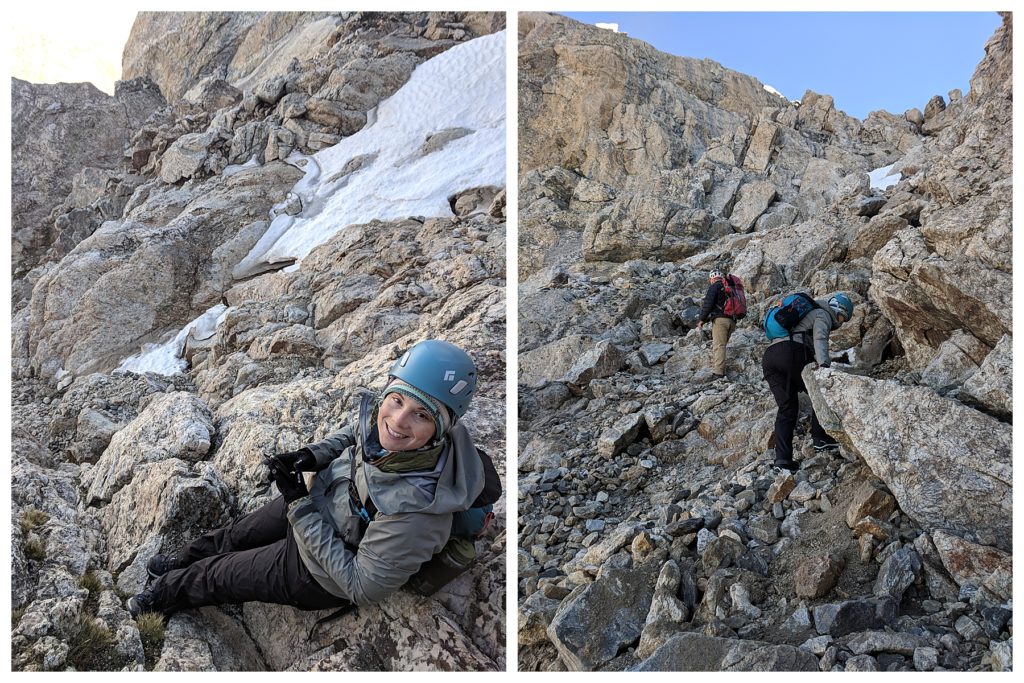
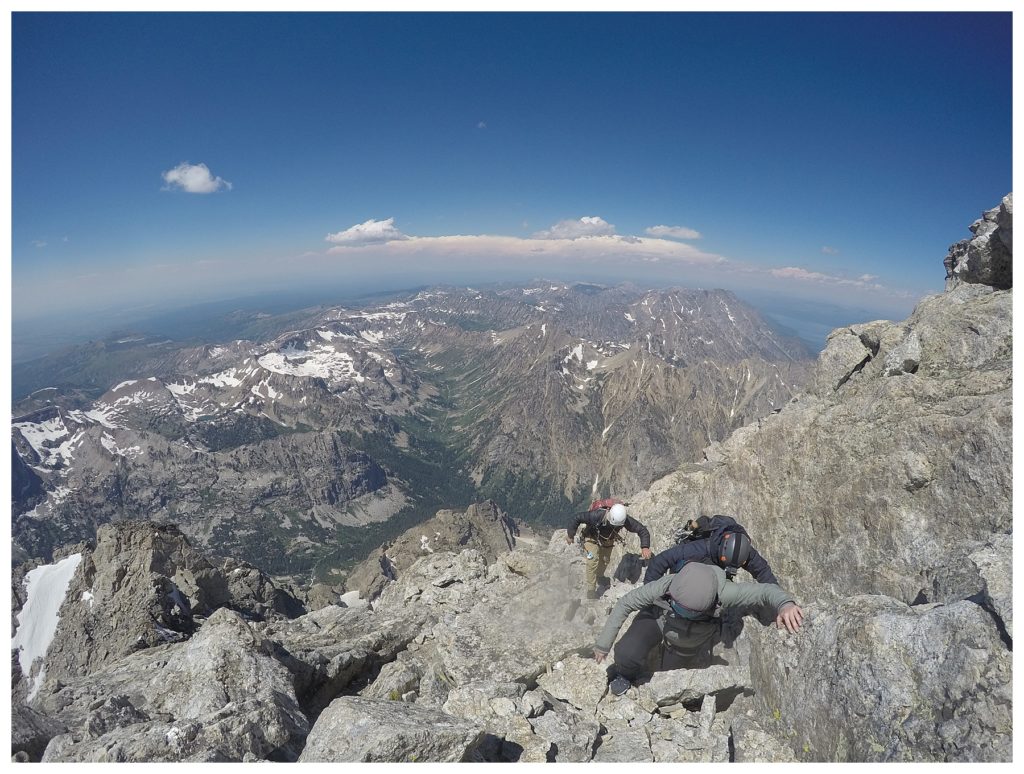
The route starts with a 1500-foot scramble up the side of Grand Teton. We were able to do this with relative ease as we only had our summit day packs. We noticed that the guide services still had folks harnessed in during the scrambles. So if you decide to go with a guide service, be ready for that.
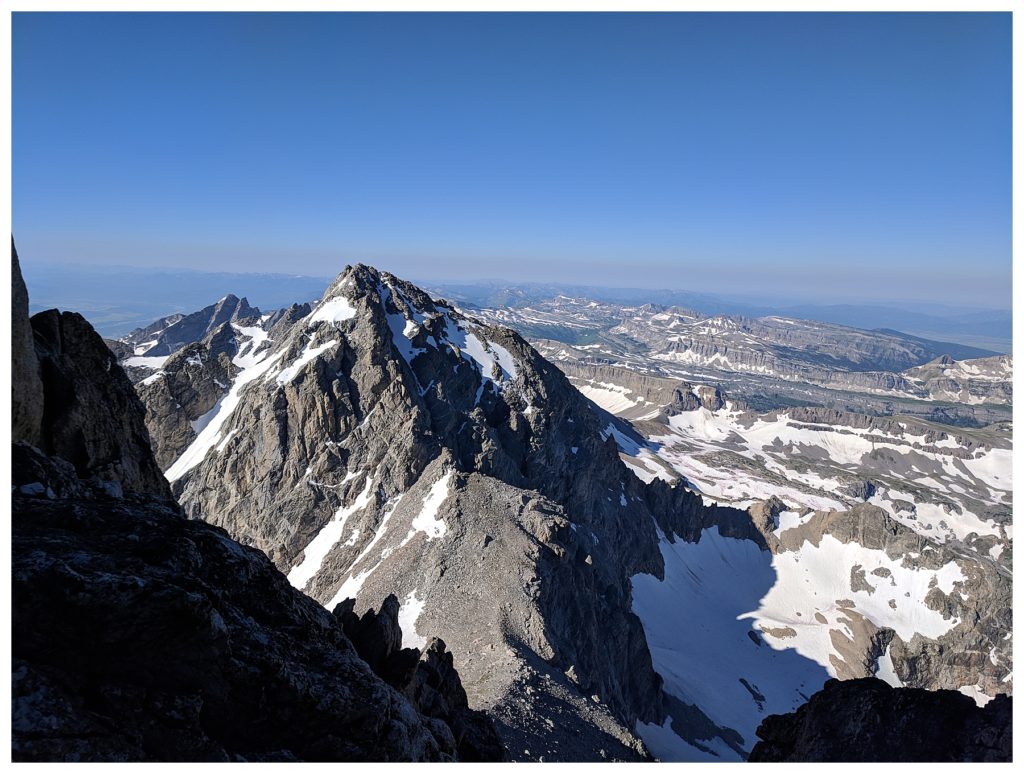
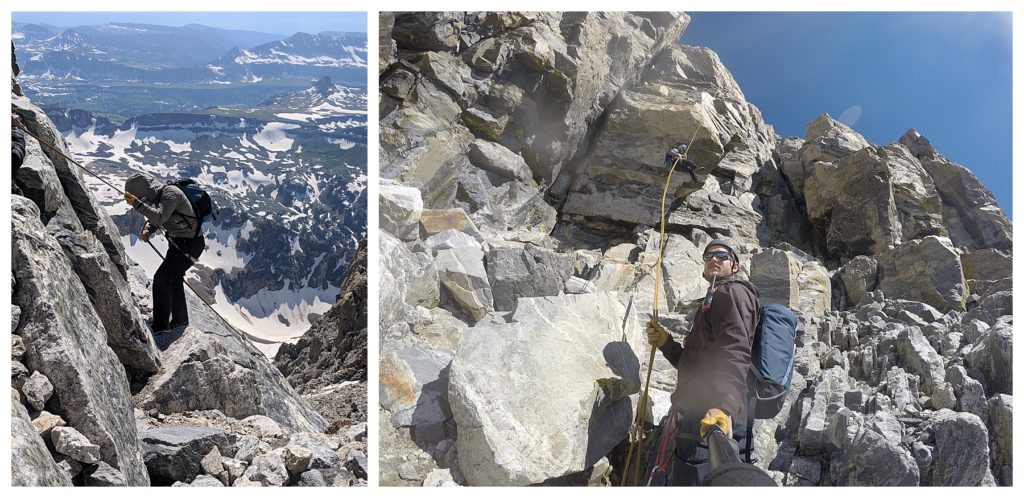
As we made our way up, the exposure started to open up. The photo above is of Middle Teton as we began to pass its summit. The higher we went, the more anxious I became. I knew what was ahead. In previous blog posts, we discussed our preparation as well as the details of the Owen Spalding route. As I mentioned before, every route has its challenges. Owen Spalding is no exception. Once you get passed the scramble, you are left with roughly 500 feet of true harnessed in climbing (grades 5.6 to 5.9 depending on the chimneys you take). However, these are not your normal climbs. You are dealing with ice and wet, slippery rock. You are in gloves and either boots or approach shoes with a pack. It is capped off with a 120 foot rappel down from the summit. That was not what worried me however. My fear and anxiety was drawn from two short sections of trail up ahead: the infamous belly crawl and the belly roll.
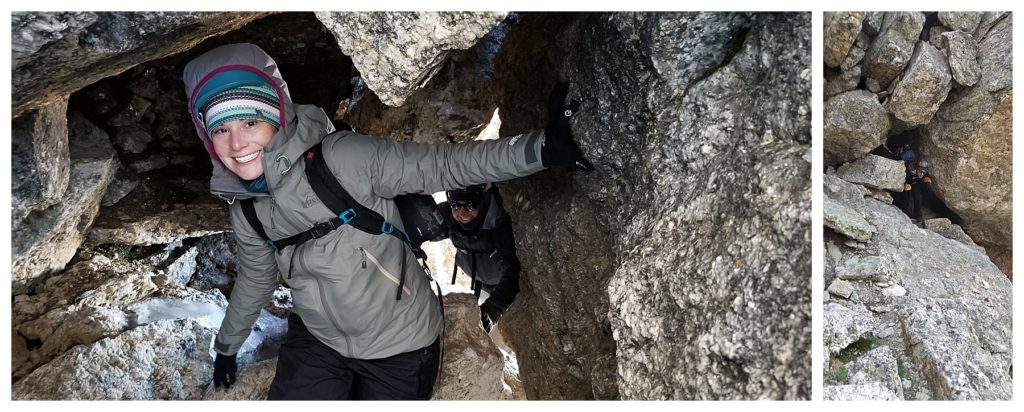

The belly crawl and roll are both perfectly named for what it is you need to do when you reach both spots. The belly roll (above left photo) requires you to slide across a large boulder to get to the other side of the trail. Beneath you, a 2,00o-foot drop. The belly crawl (above right photo) is a cutout in the side of Grand Teton almost in the shape of a “C”. You have two options for getting through. The first is to crawl on your belly through the small opening. The second option is to straddle or hang off the the outside of the bottom ledge of the “C”. Once again, it is a 2,000-foot drop off that greets you.
As we finished our scramble out of the Lower Saddle and approached a tall, flat wall with no openings, I knew where we were. My heart started pounding and my eyes began to water. Mike looked around the corner, looked back and said it was time to harness in. We were at the belly roll. He looked at me and asked if I was ready. I can’t remember what I said, but it was definitely not yes. Honestly, I’m not sure I would ever be ready to do this. But here we were and there was only one way to go. So I harnessed in, closed my eyes and took a deep breath before stepping out onto the boulder. I’m fairly confident that I held my breath the entire time. That is except when I yelled at Mike for pulling my rope so tight that I couldn’t move. Knowing how terrified I was, Mike had taken all the slack out of my rope so that if I fell, I would not go very far. Mike quickly adjusted my rope and I scurried as fast as I could around the boulder to the other side. Once there, I began to cry. The adrenaline was wearing off as I waited for the rest of the group. I was left with my raw emotions as I finally began to grasp what we were in the middle of doing. At that moment, I shifted my thoughts to the children at Duke Hospital who were fighting for their lives battling cancer. Facing my fears at that moment did not seem as hard when compared to what they were up against. I dried my face, took my contacts out and washed them down with some water (yes, I had to clean my contacts out at 13,000 feet in the air clinging to the side of a mountain). I was finally ready to summit Grand Teton.
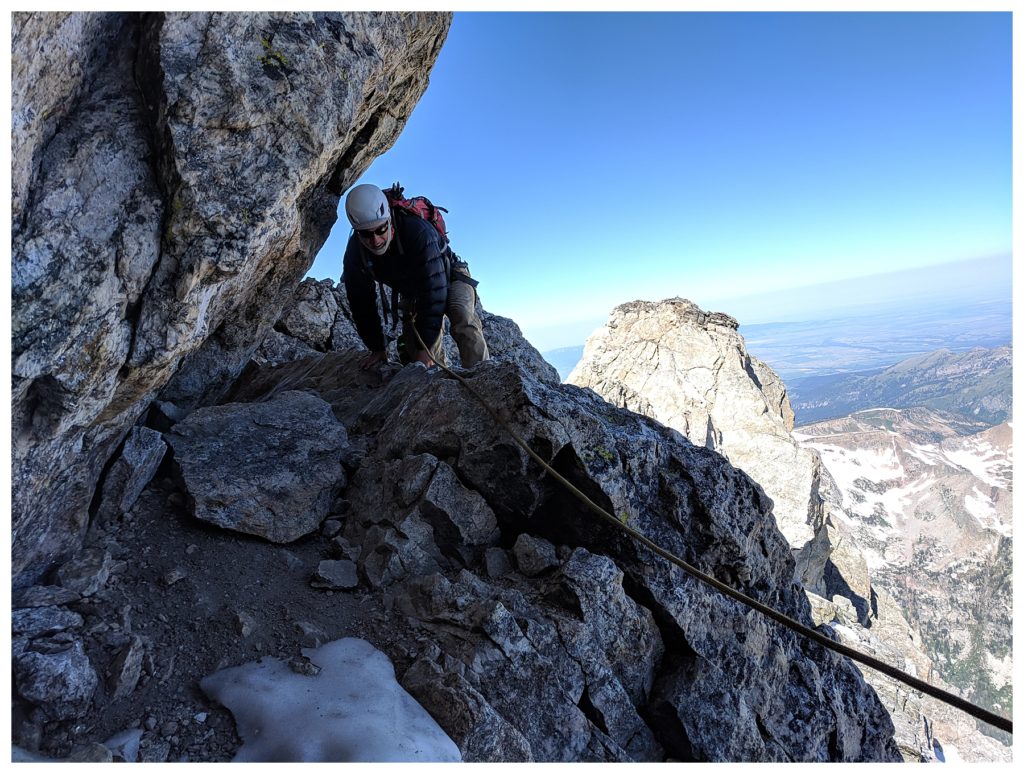
After completing the belly roll, the belly crawl did not seem nearly as intimidating. In the photo above, Mike finishes his crossing of the belly crawl. None of us were small enough to do the actual belly crawl.
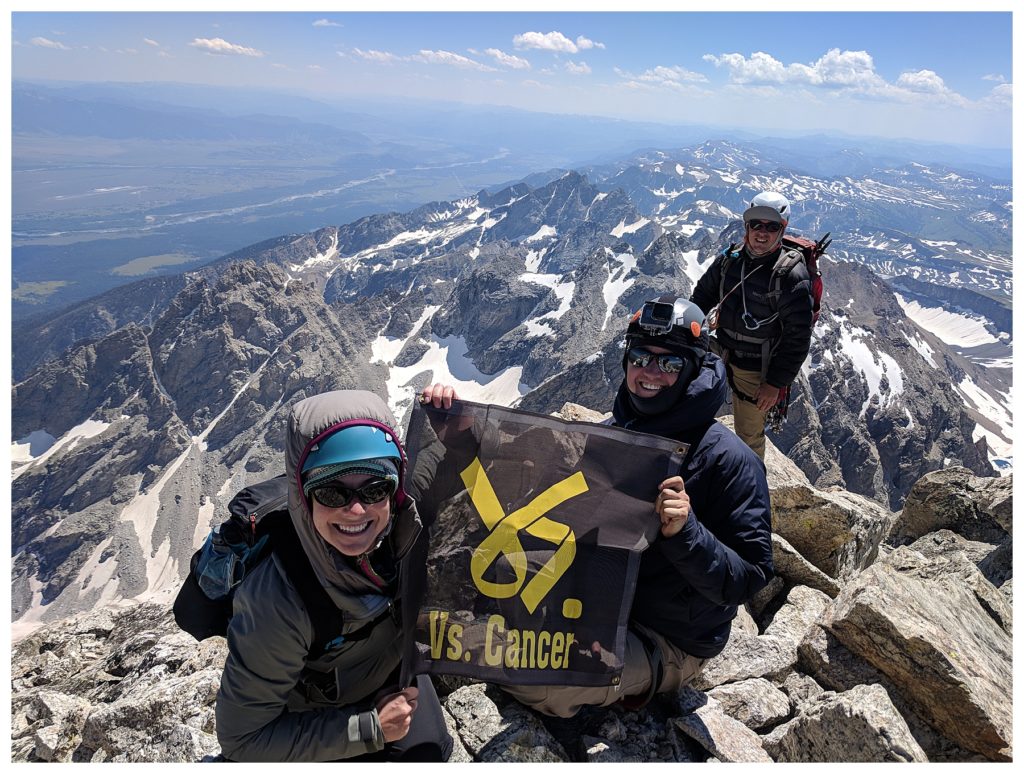
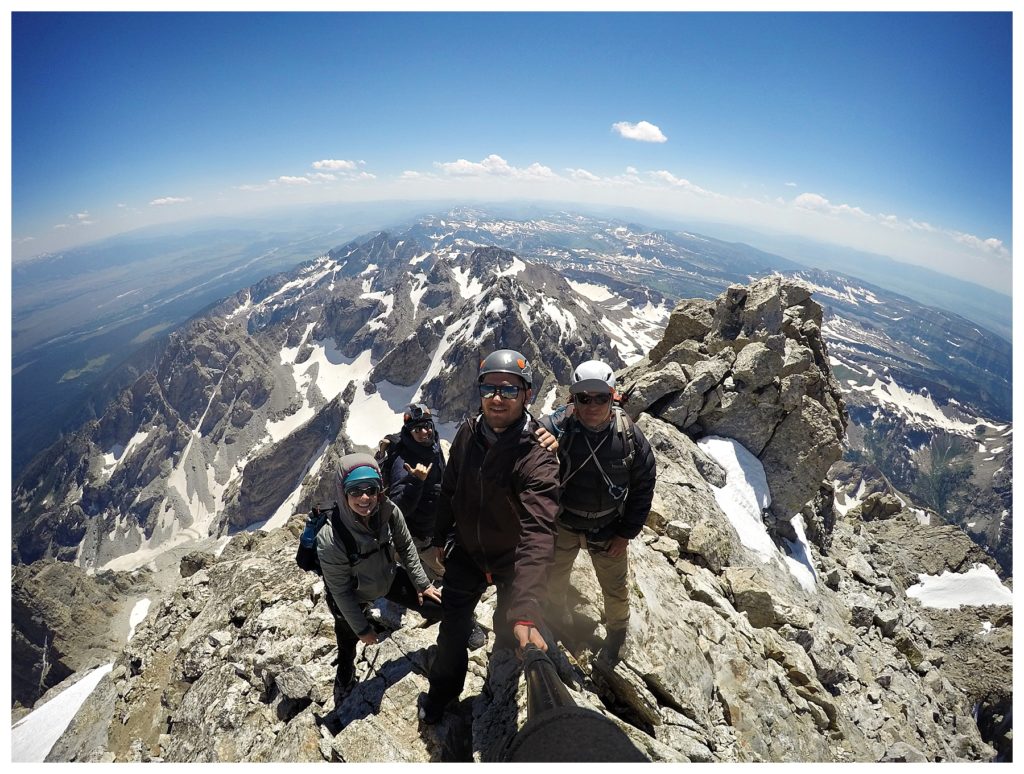
Finally, around 3 p.m., we made our final approach to the summit. I can’t begin to describe the feelings that ran through my body at that moment. It was a combination of relief, accomplishment and awe. After a few minutes of high fives and taking in the views, we pulled out the Vs. Cancer flag and took the most important photo of our trip. We had accomplished our goal.
It was a special moment for me. I never thought I had it in me to tackle something like this. I truly felt on top of the world. The view certainly made it seem that way. To know that I was able to face one of my biggest fears while impacting the lives of kids battling cancer made it that much sweeter.
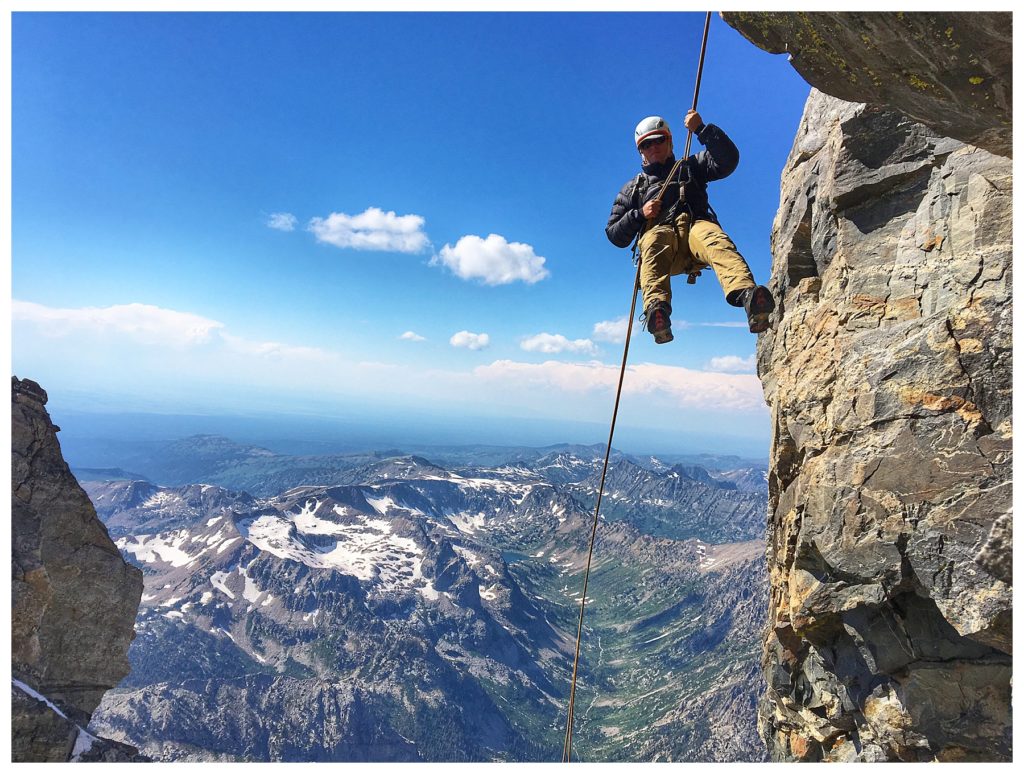
The last big hurdle to tackle was the 120 foot rappel. After conquering the belly roll and the crawl, this was nothing!
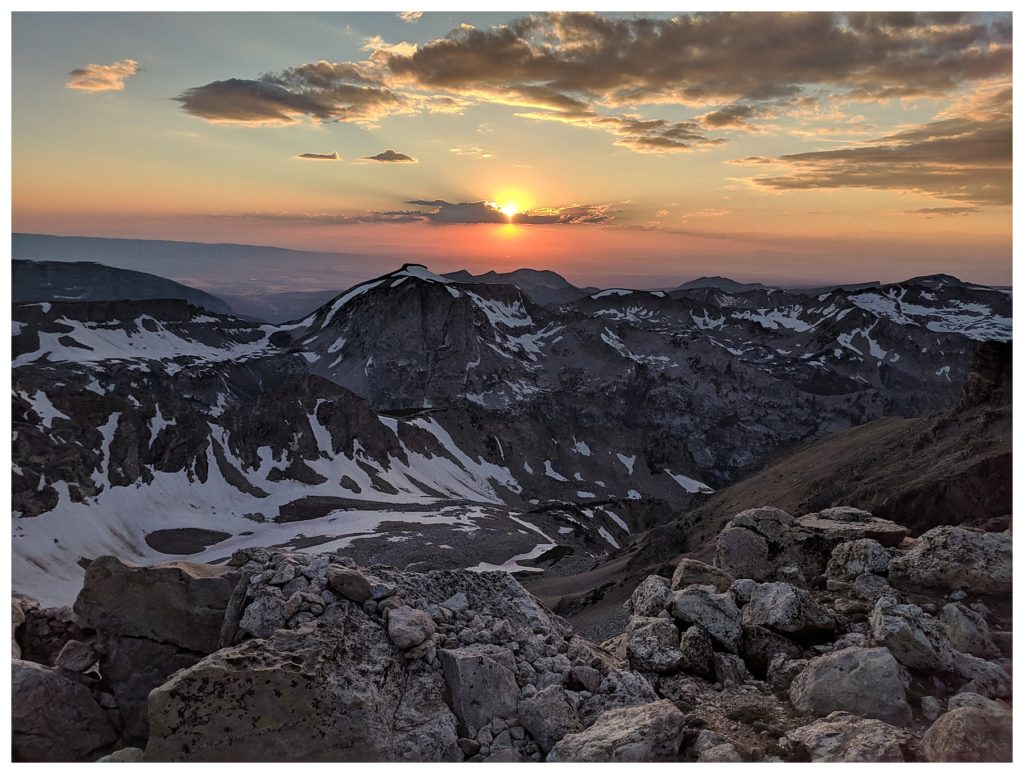
A beautiful sunset greeted us back at the Lower Saddle campground.
As the sun rose on day three, we packed up and began making our way back down. The hike down was beautiful, giving us the chance to enjoy a lot of the things we rushed by on our way up. I’m not sure if it was the downhill hike, the perfect weather or the massive meal that was waiting for us at the end, but our hike on day three went much faster than day one.
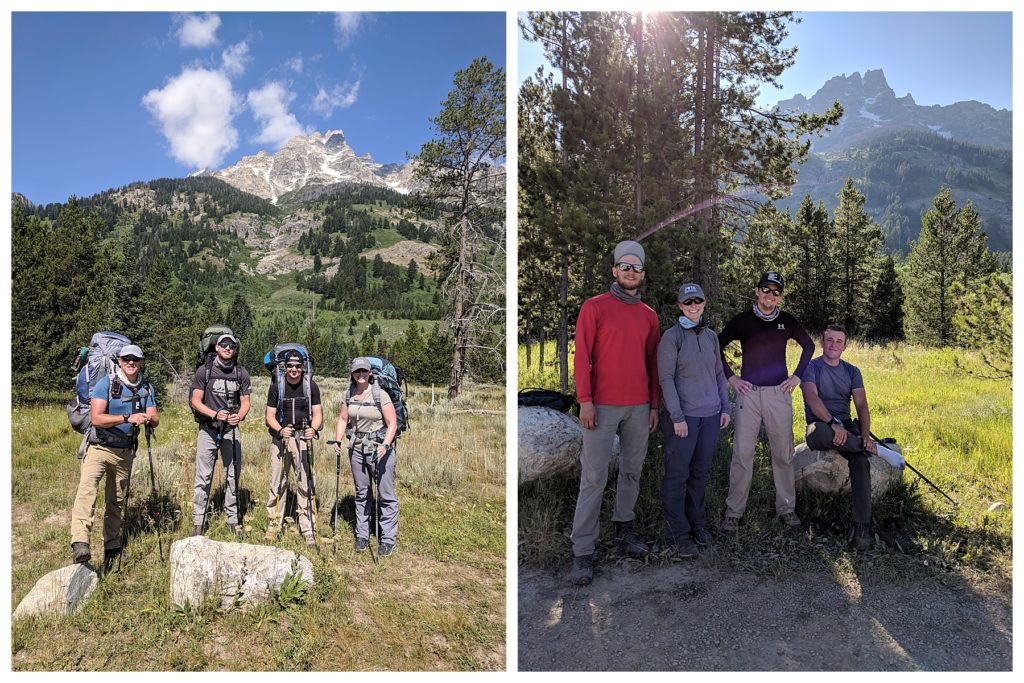
Going in and coming out. Quite the good looking group, right?
We did take video of parts of the hike. You can watch some of the highlights below.
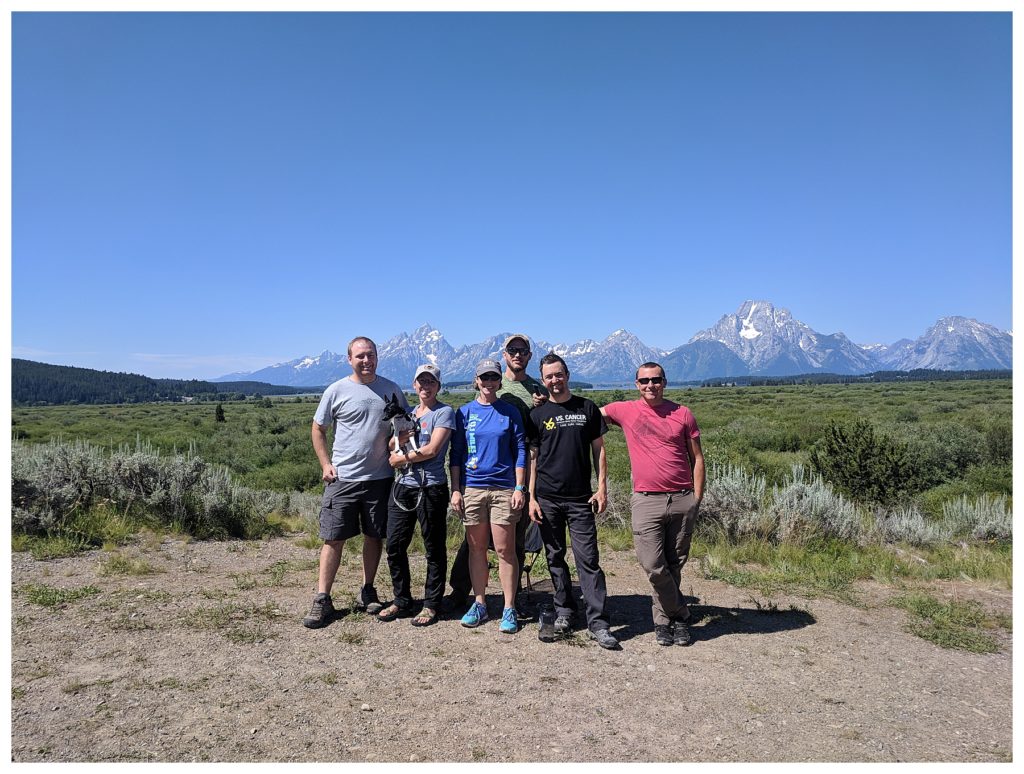
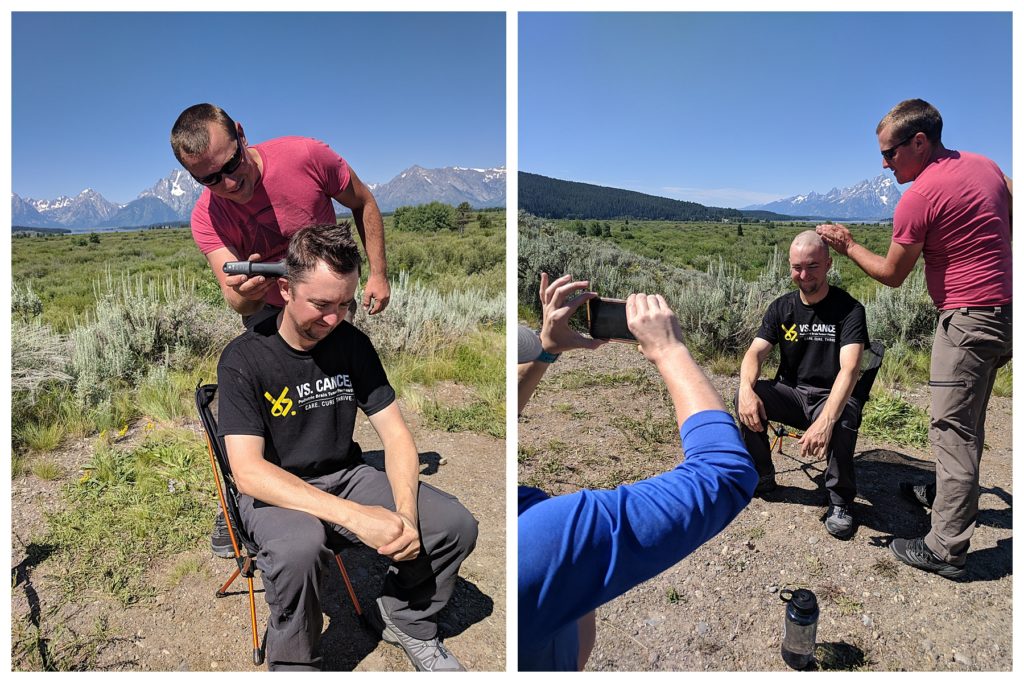
We could not end the trip without at least one person going bald for Vs. Cancer. With Grand Teton as a backdrop, we posed for a full group photo before shaving Nathan’s head. Bald if beautiful!

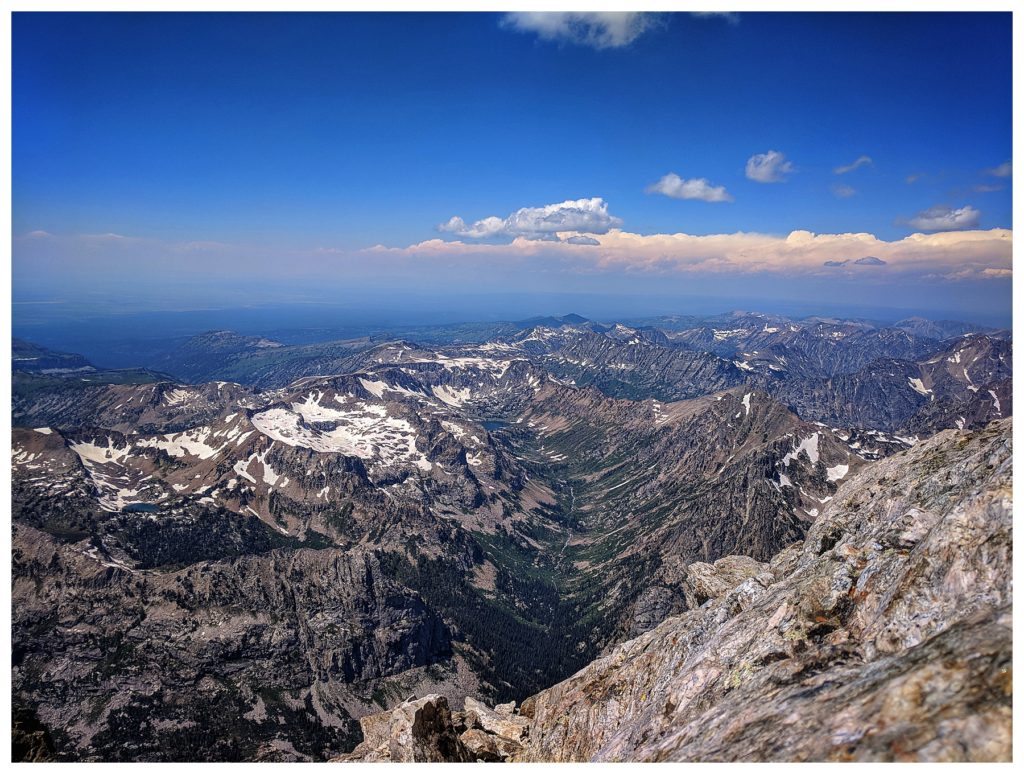
One last look at the Grand before we headed out. What an incredible, life changing experience. I cannot wait to return to those mountains!